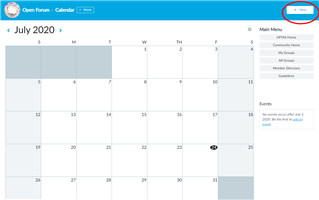
Events can be added to represent meetings, reminders, milestones or other date-oriented occurrences on a calendar application within a group. To add an event to an existing calendar, navigate to the calendar and click the New button:

Enter the following event information:
- Title: The title for the event.
- Location: Enter the location for the event.
- Website: Enter an optional URL for the event. For example, if the event has its own web site.
- Start: Select the event start date on the clickable calendar or type it and type the start time in the field.
- End: Select the event end date on the clickable calendar or type it and type the start time in the field.
- Time Zone: If the time zone occurs in a time zone other than your current time zone, select the location's time zone. Refer to this page on setting your time zone before creating an event.
- Description: Enter the description for the event.
- Registrations: Select from the following options -
- No registration required: There is no registration, invitation, or confirmation. If you are just using the Community Calendar to give informational data (keep track of events occurring in a Region, etc.) this would be the best option to select.
- Registration (RSVP): Similar to open registration, it allows a user to fill out the registration form, but he/she is not confirmed for attendance until someone manually approves the registration. (Or it may be disapproved.) An invitation can be used with this registration method.
- Registration (no RSVP): Users navigate to the event URL and register for it, and they are automatically saved a spot. (These can also be disapproved.) An invitation can be used with this registration method.
- Invitation only: There is no registration form for this event. Users must be invited.
- Maximum registrants: For events supporting registration, the maximum number of registrants allowed.
- Tags: Any tags that will categorize the event. Think of this as a keyword.
Click Save.

